The following tutorial outlines how to edit the logo with Adobe Fireworks CS3. Fireworks is required for logo editing.
You will want to install the provided fonts before proceeding to edit in Fireworks, if you wish to use the same font for your logo editing.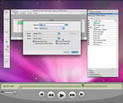
Logo Editing Video Tutorial
Learn how to customise your Nexus logo using Adobe Fireworks with this detailed video tutorial.
Step 1
Open the nexus-logo.png file in Adobe Fireworks. Focus on the right column, titled Layers. Select the Web layers directory and click the eye icon to the left of the logo slice (the green object). This will make the slice invisible so you can edit the file.
Step 2
Double click on the logo text. Now you can edit the text of logo to your choosing.
Next, select the other text of the logo, to the left of the original. Proceed with the same process of double clicking and editing. As the text will most likely overlap, you will need to select the underlay portion and move it to the right.
You will notice the icon left of the logo name, you can keep it but in this guide we shall remove it.
Step 3
Reactivate the Slice in the Web Layers column, this will place a green rectangle over the logo image. Change the size of the slice to match the new size if applicable.
Step 4
Now you will want to export the logo. Right click on the image slice and select Exported Selected Slices... from the contextual menu. Proceed to export it to your computer for uploading.
Step 5
If you are new to Fireworks, you may be wondering why it appears that there is only one style variation in the source. This is not the case as we take advantage of the Frame features of Fireworks. You need to simply switch frames to see all the other style variation sources.
There are a few ways to change frames and we will show 2 methods that you can use.
In the right column where you find the Layers toolbar including the Web Layers area, you should see another tab/toolbar named Frames. Just left click on the title Frames to enter the frames area. Then you can click on either of the frames which are named to show which style variant is on that particular frame.
The second method is the most easiest and simplistic. At the bottom of the Fireworks canvas is a row of buttons, arrows just as previous and next. Select the arrows to switch between frames.
Step 6
Once you have successfully edited then exported your new logo, you will need to upload it to your server. This process is best done via a FTP client such as Filezilla
- Open your FTP client on your local computer.
- Login to your web server where Nexus is installed.
- Navigate to the /templates/rt_nexus_j15/images/header/*style* directory.
- Upload logo.png (and any other logo related images) to this directory (You may need to browse on the local panel in the FTP client to find where you have exported your logo).
- Clear your browser cache before viewing such as using the keyboard commands on Windows, Ctrl+F5.